
Unity Tutorial - GameObject Axis

Unity Tutoria - You use the toolbar to manipulate the various GameObjects in the Scene view. You’ll be using the following tools a lot as you develop your game, so get familiar with them by trying out all of them on your empty project!
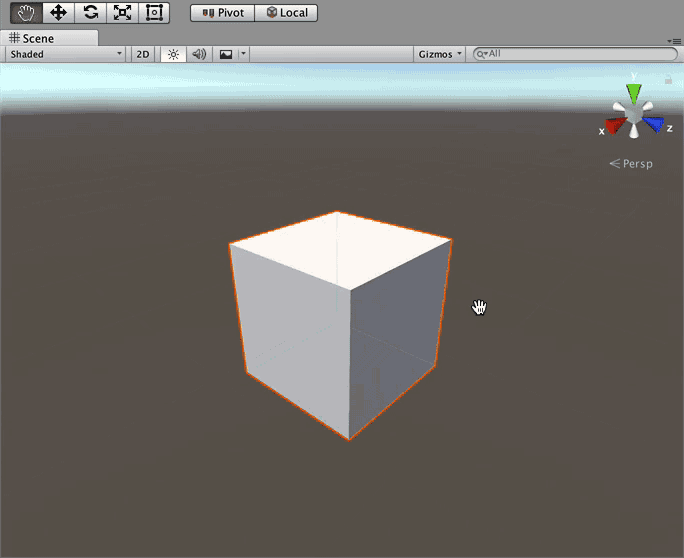
However, you won’t be able to see the effect very well in an empty Scene. So add a simple Cube to the scene:
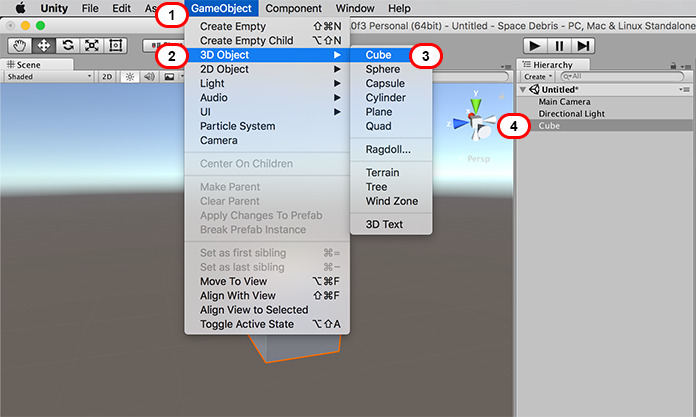
- Open the GameObject dropdown from the Unity Menu.
- Select the 3D Object dropdown.
- Select Cube from the list of available objects. This will give you a visual reference point while you explore the Toolbar options.Note: if you lose track of the Cube while experimenting with the options, just Double Click the Cube GameObject in the Hierachy View. This will center the Cube for you in the Scene View.
The Hand tool is a “handy” tool (don’t worry folks, the jokes get worse!) with a bunch of useful features built right in:
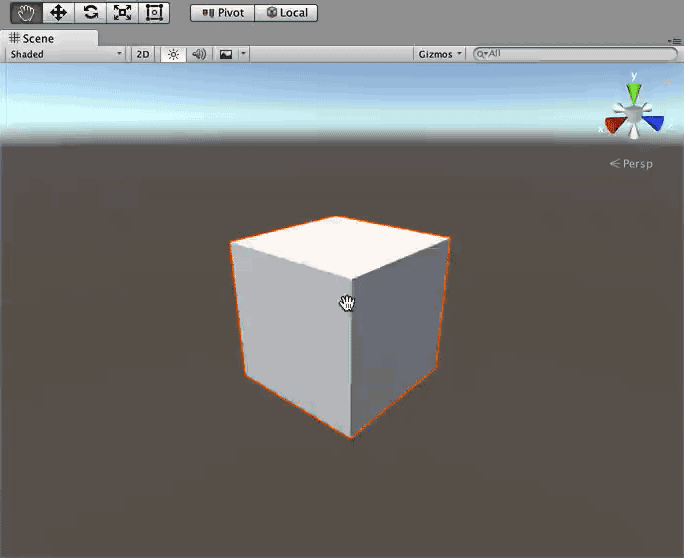
Select the Hand tool, then drag over the Scene view to pan the entire scene:
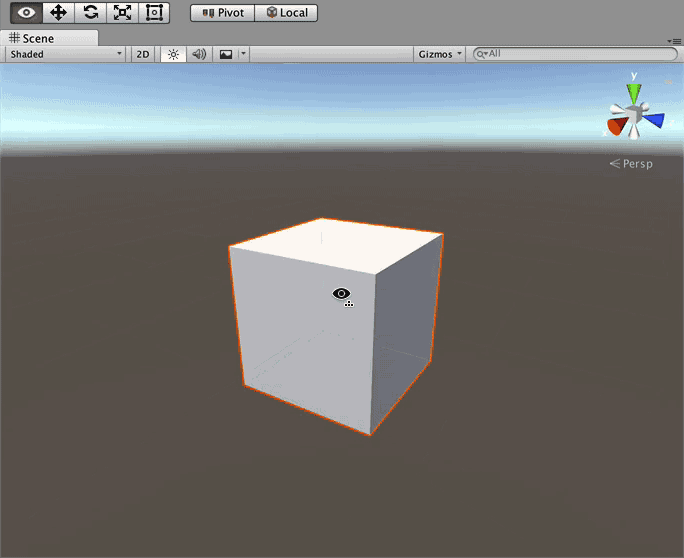
Right-click and drag to rotate the camera around your current position; notice that the hand icon transforms into an eye:
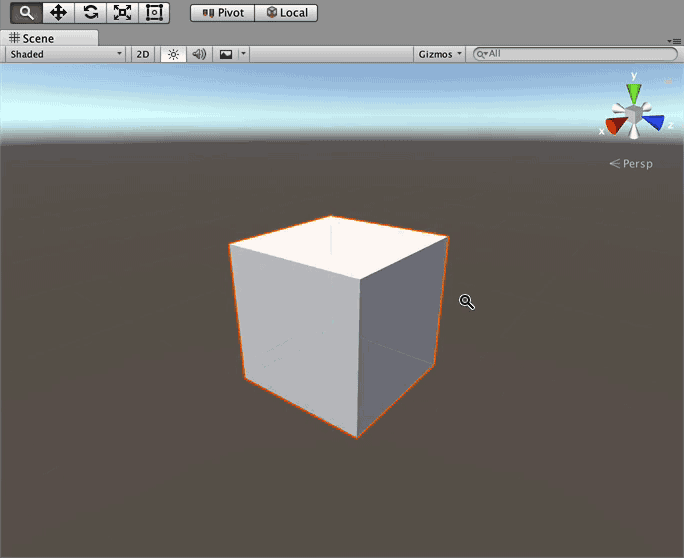
Next, hold down Ctrl (or Cmd) and Alt (or Option), right-click and move the mouse up to zoom into the scene. Moving the mouse down zooms out. Or if you want do it the easy way, just just use the scroll wheel:
Finally, hold down the right mouse button and use your WASD keys to move around the scene like you would in a first person shooter. Likewise, you can move up and down by pressing E or Q respectively. To move even faster, hold down the Shift key as well:
The hand tool’s default shortcut key is Q. To jump quickly to the hand tool, press the middle mouse button. Once you release it, you’ll return back to the previous tool you were using.
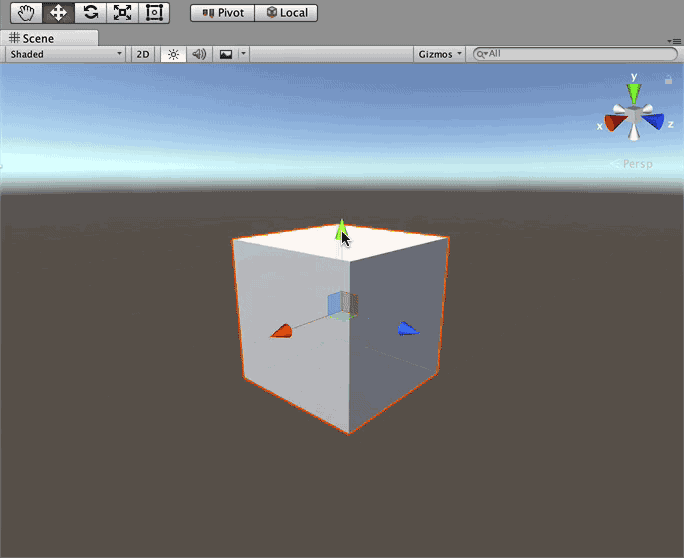
The Translate tool lets you select and position a GameObject in the scene:

You’ll notice when you select a GameObject while the Translate Tool is active, you’ll see three colored arrows growing from its center. These arrows indicate the three-dimensional axes of the object: the x-axis is the red arrow, the y-axis is the green arrow, and the z-axis is the blue arrow:
Unity’s coordinate system is left-handed. For a deeper explanation about left- and right-handed coordinate systems, check out this interesting article about the different coordinate systems..
Note: this group of three colored arrows are known as a gizmo in Unity-speak. A gizmo is 3D geometry or texture that provides information regarding the GameObject.
In this case, the gizmo indicates the direction of each axis. As you learn more about Unity, you’ll be able to add your own gizmos to indicate things such as spawn points, the location of cameras or even the wind direction. The great thing about gizmos is they’re only displayed in the Scene View, and you can turn them off when they’re no longer needed.
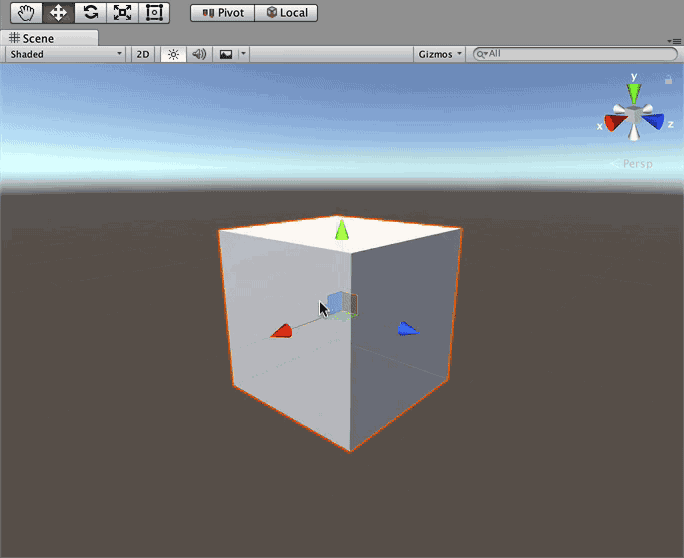
There are many ways to move your GameObject with the Translate tool. You can select one of the arrows (which will turn Yellow when selected), then move the mouse; the GameObject will only move on that one axis. For example, if you selected the y-axis and moved an object while facing in a normal orientation, the GameObject would only move up or down.

Detailed view of the three axis and the three planes that you can select to move the GameObject.
The three colored planes in the center of the GameObject let you move the GameObject on two axes; the square’s color indicates on what plane it will move. For instance, a green square means you can move an object on the y-plane (which means it can move on the x and y-axes):
The default shortcut key for the translate tool is W.
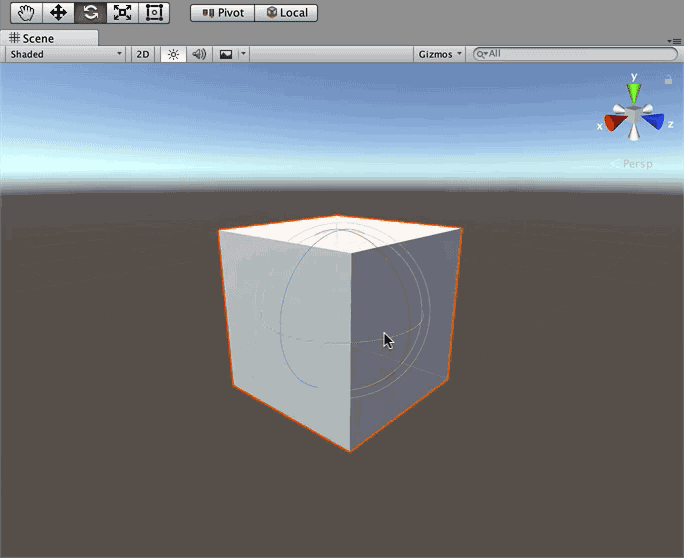
The rotate tool, unsurprisingly, lets you rotate objects:
You’ll notice three spherical colored lines when you select an object to rotate; these lines indicate the axis to rotate around. Simply select the line and drag your mouse to rotate the GameObject. To free rotate without being constrained to an axis, select the space between the lines and move your mouse:
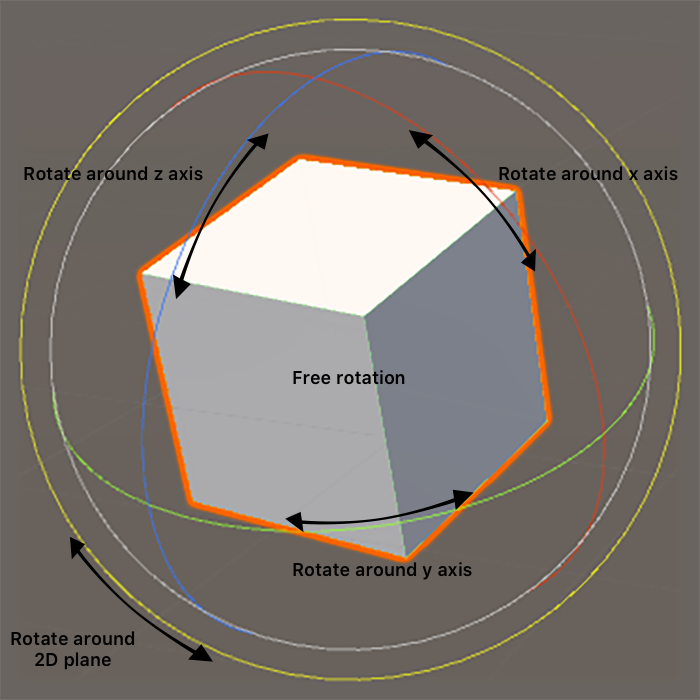
Select one of the colored lines to rotate around that axis.
The default shortcut key for the rotate tool is E.
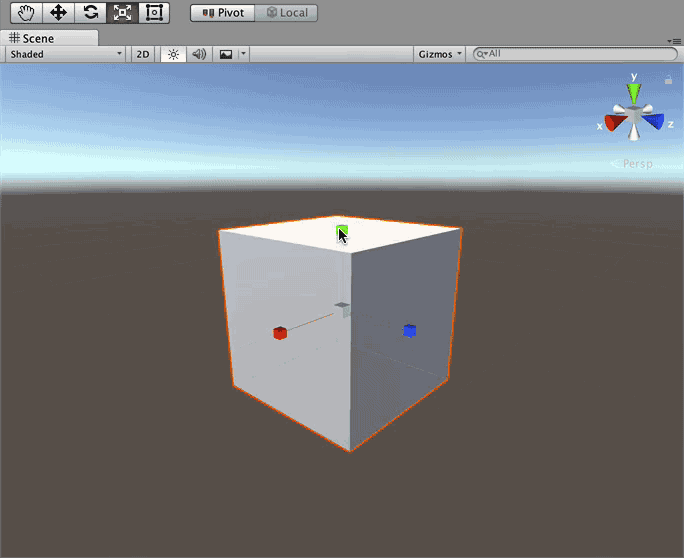
The Scale tool lets you scale a GameObject either along a single axis, or proportionately on all axes.
To scale an object along an axis, select the GameObject then drag the square end of an axis line; the GameObject will scale along that axis. To scale the entire GameObject, select the center point of the GameObject and drag the mouse either forwards or backwards to scale the GameObject up or down respectively:
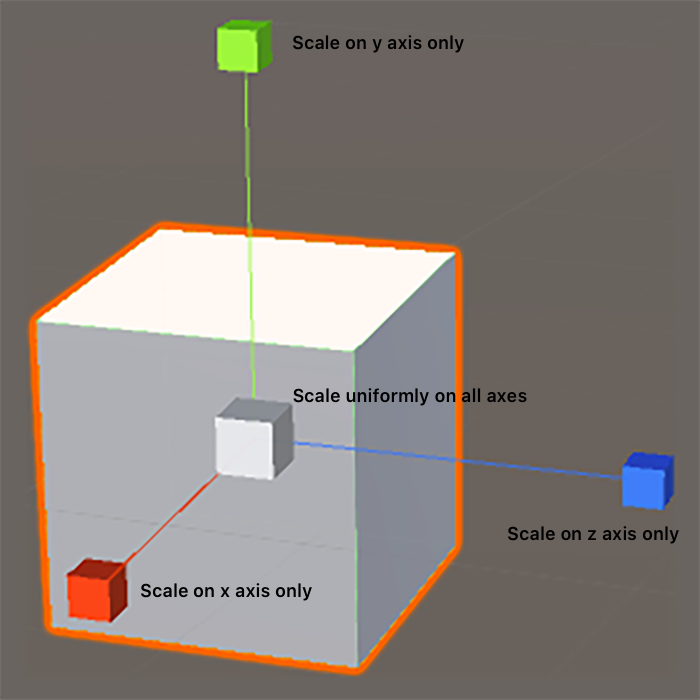
Scaling details; select one of the three axis to scale along that axis or the cube at the center of the axis to scale proportionally.
The default shortcut key for the scale tool is R.
Note: Some of you may be a bit confused by the shortcut keys. You’d assume the Scale shortcut would be the S key instead of R. Believe it or not, there is a method to the madness. Do you notice a familiar pattern in the shortcut keys…perhaps one right at your fingertips?
Yep, it’s the top row of the keyboard! :] Unity assumes you’re using the mouse with your right hand and keyboarding with your left. Your fingers, at rest on the home row, will be on the ASDF keys. You’ll note each shortcut key of the toolbar corresponds to a key above the home position. The keyboard shortcuts for the toolbar corresponds to the QWERT keys, from left to right.

Unfortunately, occasionally you’ll try to press the W key but press the 2 key by mistake. This puts the editor into 2D mode and will look a lot like this:
In 2D mode, objects lose their depth
When that happens, simply press 2 again and the editor will revert back to 3D mode.
The Rect tool is primarily used with 2D GameObjects and User Interface (UI) GameObjects, although you can use it on 3D GameObjects as well.
The tool can resize, scale, and rotate 2D assets and also reset the pivot point, which is the center point of rotation for the object. The pivot point is represented by a large circle on the asset:

Can you guess its default shortcut key? That’s right, it’s T.
The gizmo display toggles tend to be a point of confusion; they’re more than buttons, in fact — they’re toggle switches that control how you position gizmos in your scene.
The first switch toggles between Center and Pivot mode. When in center mode, if you select two GameObjects, the gizmo will be placed in the center of the two objects. Rotating the GameObjects rotates them around the center gizmo. In pivot mode, each GameObject rotates around its own pivot point, as illustrated below:

The second switch toggles between Global and Local space. In global mode, you’re manipulating your object from the point of view of the world around it. The x-axis goes left to right, the y-axis goes up and down, and the z-axis goes forward and backwards like usual. Switching to local mode works from the coordinate system of the object itself, and changes the axes to match that of the actual GameObject:


No comments